Bonsailist
SpeciesCategoriesGuidesQuestionsToolsStylesAbout
Bonsailist

The field guide for your first bonsai — care with real numbers, honest species picks, and tools that do the math for you.

Browse

  • All Species
  • Categories
  • Bonsai Styles
  • Compare Species

Learn

  • Care Guides
  • Bonsai Tools
  • Common Questions
  • Best For
  • Climate Zones

About

  • About Us
  • Sitemap
© 2026 BonsaiList. All rights reserved.
Privacy PolicyTerms of ServiceAccessibility
  1. Home
  2. /
  3. Guides
  4. /
  5. Bonsai Pruning Guide
Field guide

Bonsai Pruning Guide

Pruning controls the shape, size, and health of your bonsai. Two types — maintenance and structural — and knowing when to use each makes all the difference.

On the benchbonsai scissorsconcave branch cutterknob cuttercut pastejin pliers

On this page

  1. Two kinds of pruning
  2. Where the blade lands
  3. Maintenance trimming, step by step
  4. Conifers play by different rules
  5. Structural pruning: choosing what goes
  6. Removing a real branch
  7. Timing by species
  8. When pruning goes wrong
  9. Quick pruning sheet

Without pruning, every bonsai eventually turns into a shapeless bush. That's not an exaggeration — left alone, a tree doesn't care about your design plans. It throws growth wherever light and energy take it. Regular pruning keeps the silhouette tight, pushes back-budding on interior wood, and improves airflow through the canopy. Healthier tree, better design. And pruning a bonsai tree correctly comes down to three habits: where the blade lands, how much you take, and when.

Two kinds of pruning

Go / no-gofour answers
Your tree
The job
The tree right now
Season where you are

Southern hemisphere: pick your season, not the calendar's.

Maintenance pruning is the frequent, light trimming you do all growing season — snipping new shoots back once they've extended. Think of it as mowing the lawn. Structural pruning is the heavy work: removing whole branches, chopping trunks, redirecting the tree's architecture. That happens in late winter or early spring for most species, when the tree is dormant or just waking up. Confuse the timing and you set the tree back months.

Two more timing habits: skip heavy pruning within a month either side of repotting your bonsai — root work and branch work are each a recovery job; stacking them doubles the bill. And give a new tree a full year of maintenance trims before structural cuts — you can't design around growth habits you haven't watched. On young stock, wait longer still: a trunk fattens fastest when shoots run free (how long it takes to grow a bonsai has the math).

Where the blade lands

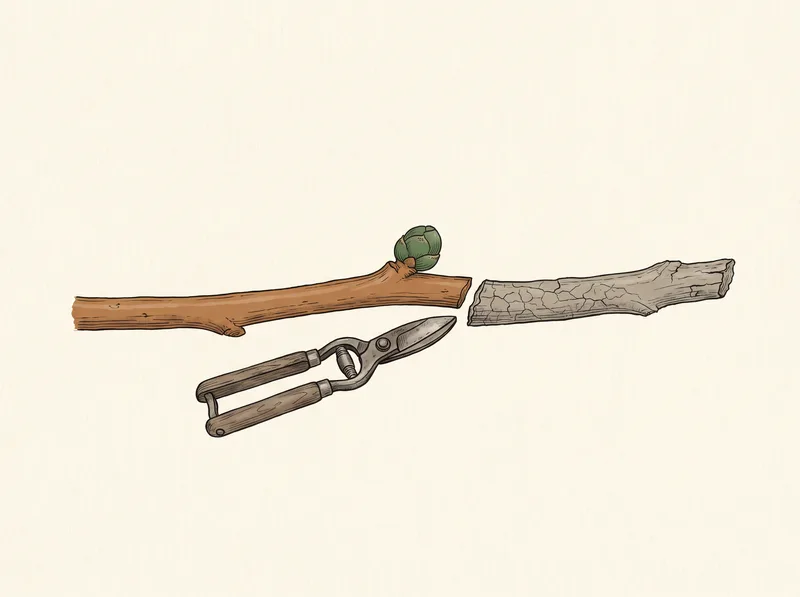
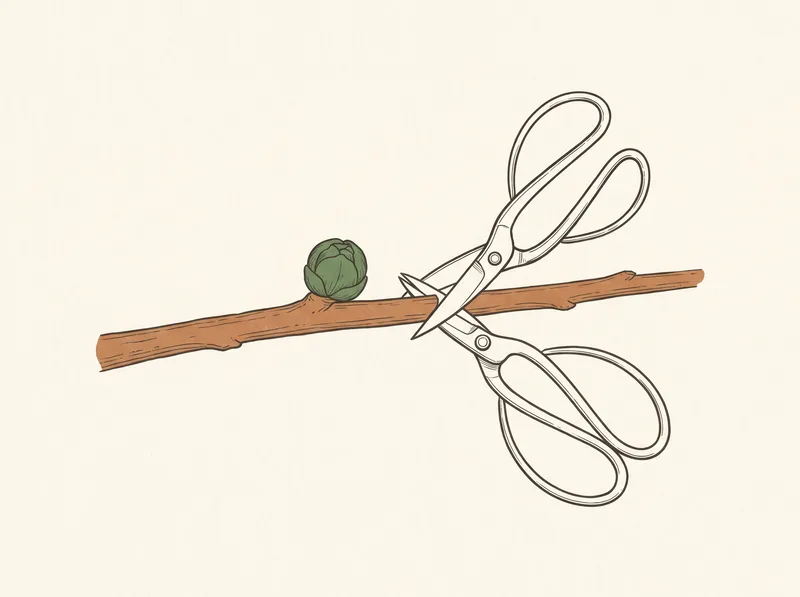
A node is where a leaf or bud attaches to the stem; the bare stem between nodes is the internode. Every cut should land 2–3 mm above a node, blade angled slightly away from the bud so water sheds off the wound instead of pooling on it. Closer and you damage the bud you're counting on; longer and the orphaned internode dies back, since a stem with no bud beyond it has nothing to keep it alive.
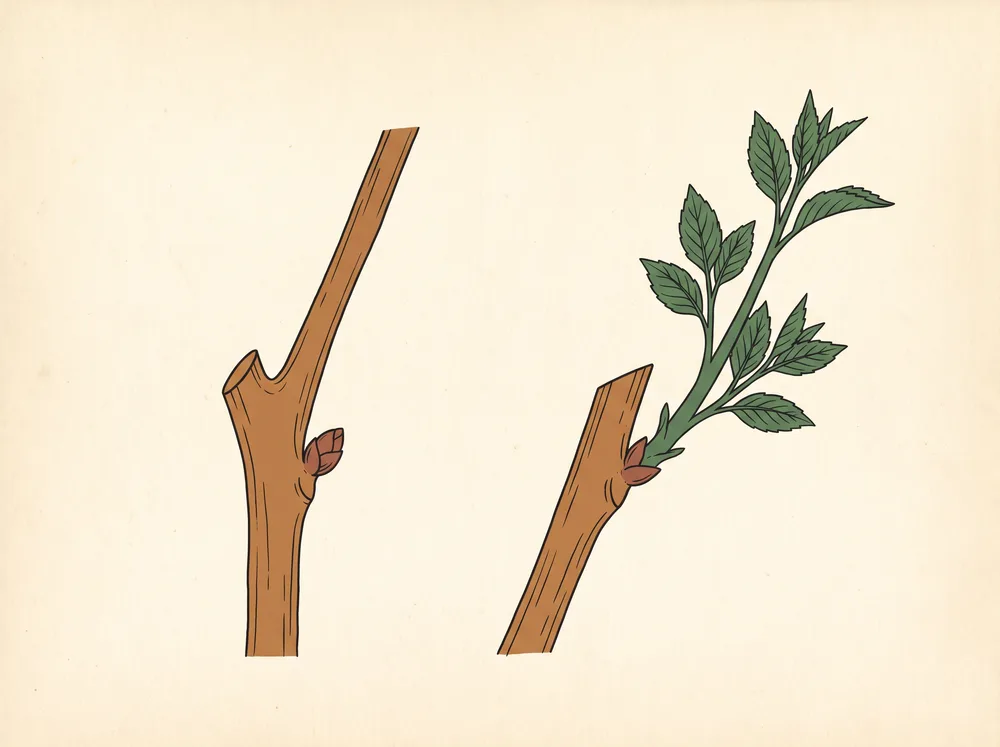
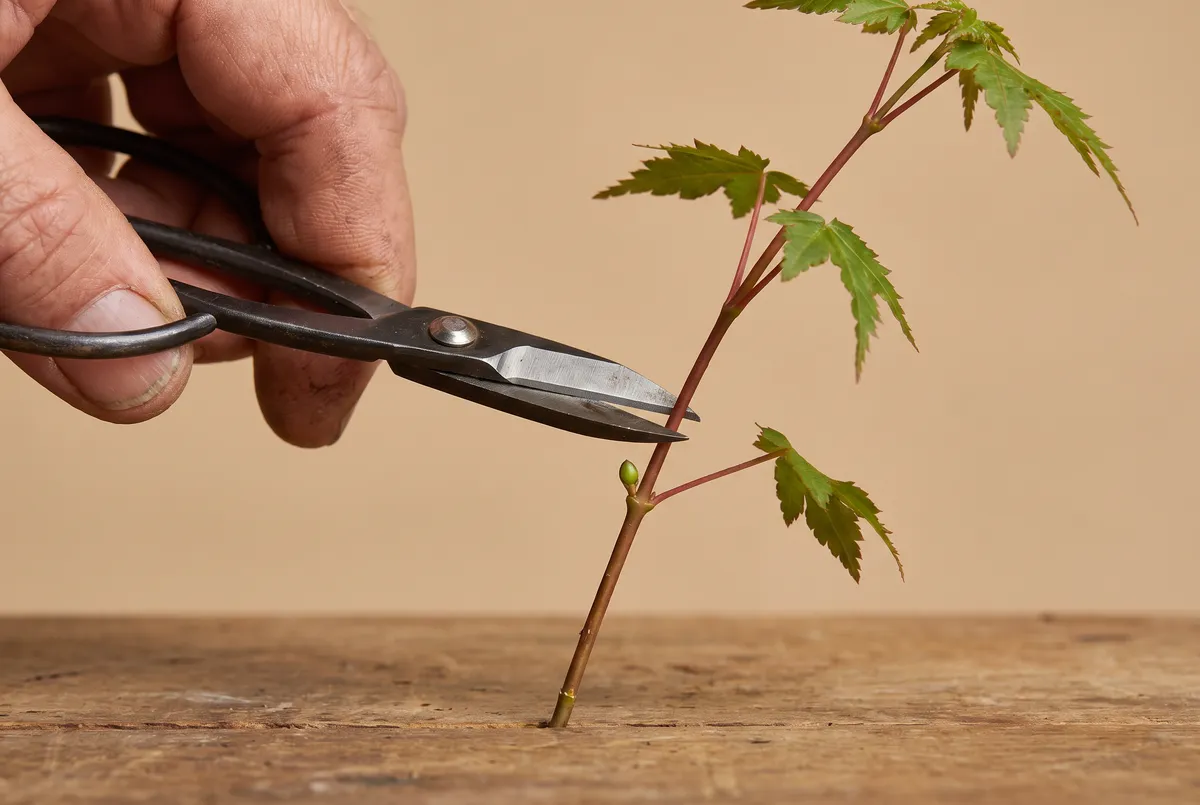
Illustration of a branch cut above an outward-facing bud, and the same branch one season later with a new shoot growing outward from that bud
Directional pruning, the payoff: the bud you cut to points where the new shoot grows — cut to an outward-facing bud, get an outward branch.
Close-up of bonsai scissors positioned just above a leaf node on a thin maple shoot, blade angled away from the bud
The whole skill at actual scale: blade 2–3 mm above the node, angled away from the bud you're keeping.

Here's what turns trimming into steering: the bud you cut back to points where the new shoot grows. Cut to an outward-facing bud and the branch extends outward; to a downward-facing bud and you build the flat, layered pads bonsai is known for. That's directional pruning — the highest-leverage skill on this page.
Where the blade lands
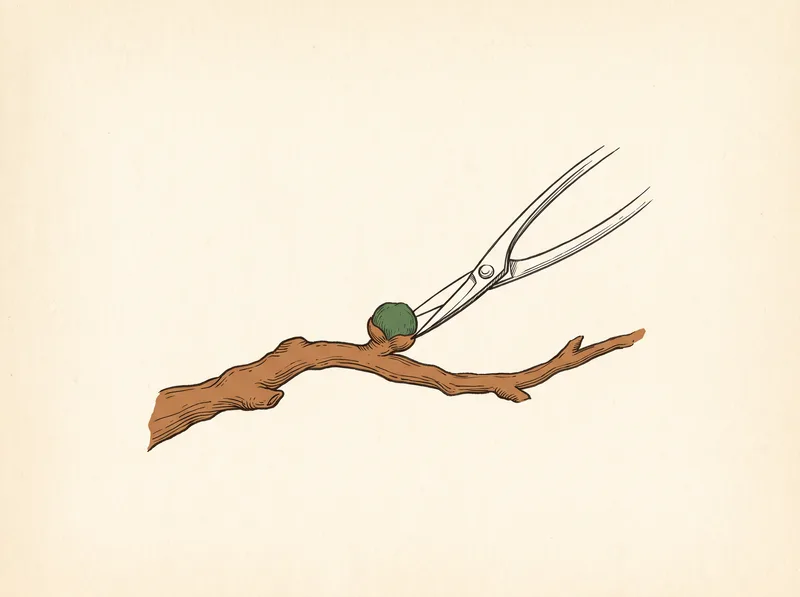
Shears cutting a branch a few millimeters beyond a bud, blade angled away from it
Right✓

2–3mm above the node, angled away from the bud
Shears cutting directly against a bud, leaving it exposed
Too close✗

the bud dries out

A long dead gray stub left beyond the bud after a cut too far away
Too long✗

the stub dies back

A concave branch cutter making a flush hollow cut where a branch met the trunk
Big branches✓

concave cut heals flush

Cut 2–3mm above a node, angled away from the bud, back to a bud facing the direction you want the new shoot to grow. For branches thicker than a pencil: undercut first, take a stub, then return with the concave cutter for the flush cut.

The four panels cover it: the good cut, the too-close cut that kills the bud, the stub that dies back, and the concave removal cut. Match the first and the rest is detail.

Maintenance trimming, step by step

  1. Let a shoot extend to four to six nodes.
  2. Cut back to two or three nodes with sharp bonsai shears — dull blades crush the stem and invite dieback. A serviceable pair runs $20–40; see the bonsai tools guide.
  3. Pick the bud you're cutting to — outward or downward-facing, per the diagram.
  4. Repeat all season. On fast deciduous trees like trident maple, Chinese elm, and zelkova, that means a light trim every couple of weeks from May through September.

Bench rule

If a shoot has stretched past six nodes, trim it now — every week it runs, the tree funds tip growth instead of the interior buds your design depends on.

Conifers play by different rules

The old advice was "pinch junipers, never cut them." The modern consensus among working professionals is close to the opposite: on a juniper, cut extended shoots back to a healthy side shoot with sharp scissors, and reserve finger-pinching for the occasional wayward tip. Routinely pinching every growing tip removes exactly the foliage a juniper uses to build strength, and weakens it over seasons. And always cut back to green — junipers almost never bud from bare wood, so a branch cut past its foliage is usually lost. Black pine runs on its own calendar of decandling and needle-pulling — a topic of its own, covered on its species page.

Never

Never shear a juniper into a green ball — a conifer's energy comes from its foliage tips, and cutting through all of them at once browns the surface and starves the tree.

Structural pruning: choosing what goes

Physiology first: trees run on apical dominance — the topmost buds release a hormone that suppresses buds below and pulls water and sugar upward, because in a forest, height wins light. In a pot, the apex grows roughly twice as fast as the lowest branch, thickening while the branch you care most about starves. Invert your instinct: prune the top hard and often, the bottom gently. Beginners do the opposite and lose their first branch to it.

Bench rule

Trim the apex about twice as hard as the lowest branches — if top and bottom get equal treatment, the bottom is losing.

Design decisions belong to the styling guide; here's the execution:

  1. Work when the branches are visible and the tree is dormant: late winter for most species.
  2. Remove the obvious flaws first: shoots growing straight up or straight down, branches pointing directly at the viewer, and crossing branches.
  3. Bar branches — two branches opposite each other at the same height — lose one.
  4. Always cut back to a node or branch junction. No stubs.
  5. Use a concave branch cutter for anything thicker than a matchstick; the hollow wound heals flush instead of leaving a bump. A decent one runs $30–60 — the specialty tool worth buying first.

Never

Never remove more than a third of the foliage in one session — leaves are the tree's food supply, and a tree stripped past that can't fund the healing you just asked of it.

Big restructuring gets spread across two or three sessions over a growing season. Weak, sick, or freshly repotted trees get maintenance trims only. Root trimming — pruning's underground half — happens at repot time, covered in the repotting guide.

Removing a real branch

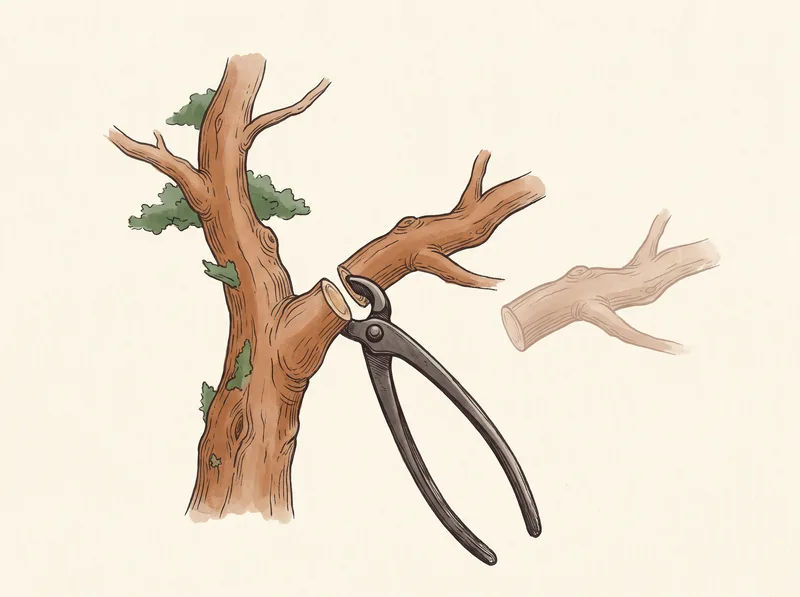
Anything thicker than a pencil (about 6 mm) gets a staged removal — a single downward cut lets the branch's weight tear a strip of bark down the trunk before the blade finishes.
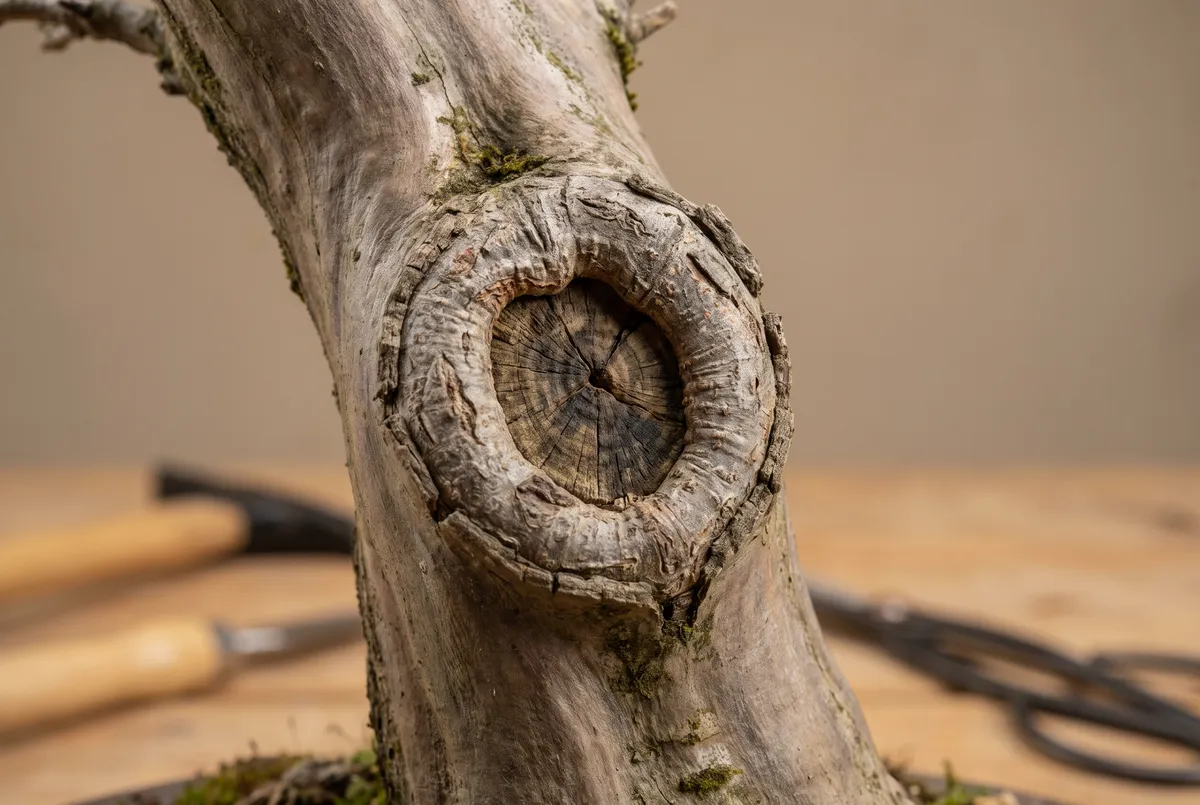
Close-up of a bonsai trunk wound with a raised callus ring healing over a concave pruning cut
What you're waiting for: callus rolling in over a concave cut. This is why the hollow wound matters — it closes flush instead of leaving a bump.
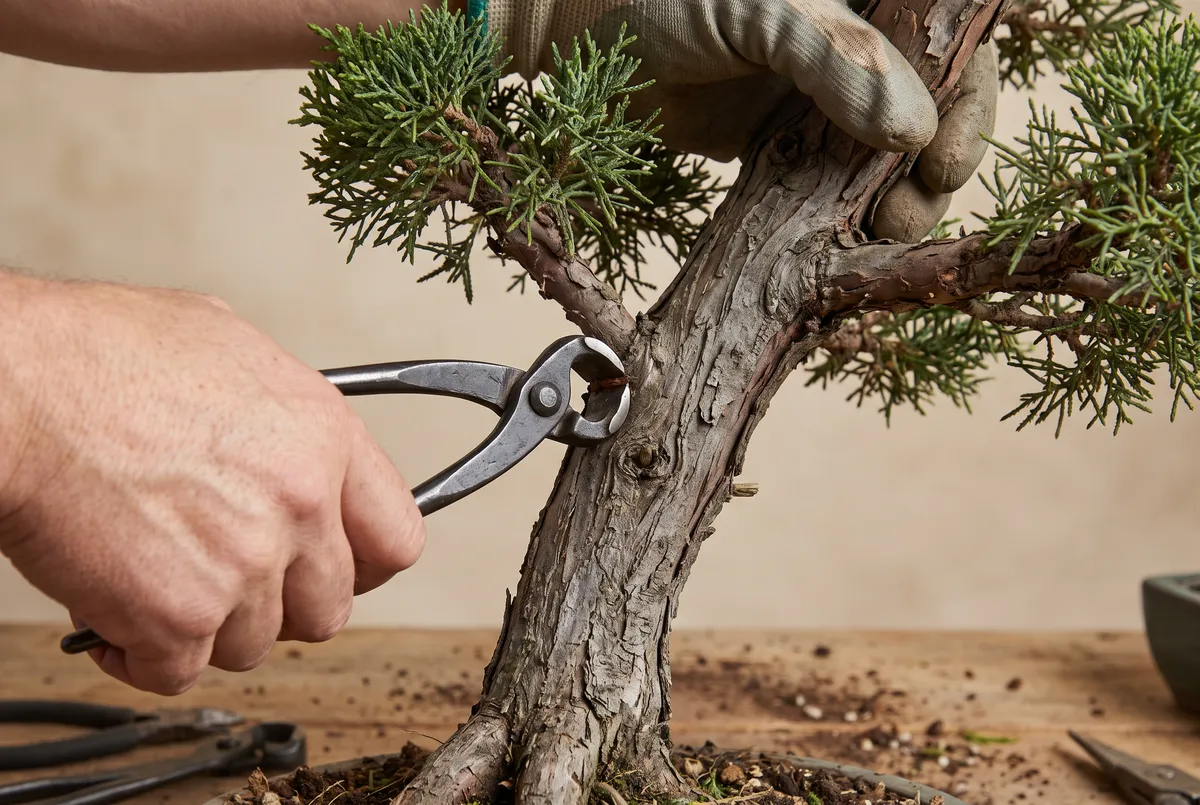
Hands using a concave branch cutter from below on a bonsai branch close to the trunk
The undercut comes first — a third of the way through from below, so the branch's weight can't tear a strip of bark down the trunk.
  1. Undercut first: cut a third of the way through the branch from below, 2–3 cm out from the trunk.
  2. Cut down from the top, slightly farther out than the undercut. The branch drops; the undercut stops any tear cold.
  3. Take the remaining stub back with the concave cutter so the wound sits slightly hollow against the trunk.
  4. Seal it. On deciduous species, cover any cut larger than a pencil with cut paste right away — it slows moisture loss and keeps pathogens out while the callus forms. Most conifers seal themselves with resin; ficus bleeds white latex for a few minutes and plugs itself.

Growers disagree on step 3's timing: flush-cut the same day, or leave the stub a season on dieback-prone species (maples especially) and clean it up dry. Both work; the undercut isn't optional.

Set honest healing expectations: a pencil-thick wound closes in one to two growing seasons; a quarter-sized wound (about 25 mm) takes three to five years; and removing a branch thicker than roughly a third of the trunk can scar permanently. On junipers and pines there's a third option: strip the bark and keep the branch as a jin, a bleached deadwood feature — the deadwood guide shows how.

After any heavy session, hold fertilizer for two to three weeks and keep the tree in bright light but out of scorching afternoon sun — its job now is healing wounds, not pushing tender growth. Planning to wire the remaining branches? Give it a few weeks between operations, and size the wire with the wire gauge tool.

Timing by species

The late-winter default covers most trees; these six punish bad timing hardest:

  • Japanese maple: twig work in late winter while dormant, again in summer once the first flush hardens — but save cuts thicker than a pencil for late summer. A maple cut while sap is rising bleeds for weeks.
  • Chinese elm: trims year-round. The mistake is not pruning — internodes stretch fast, and a month of neglect costs the tight silhouette.
  • Juniper: spring through fall, always back to a side shoot, never into bare wood.
  • Black pine: decandling in early summer, needle-pulling in fall — and decandling is for vigorous trees only; on a weak pine it can be fatal.
  • Satsuki azalea: immediately after flowering, no later than four to six weeks after blooms fade — azaleas set next spring's flower buds by mid-to-late summer, so a late haircut costs a whole season of bloom.
  • Ficus: any month — it never truly goes dormant indoors. Regrowth follows light, though, so winter cuts refill slowly.

Bench rule

If it flowers, prune within four to six weeks after the blooms fade — any later and you're cutting off next year's flowers.

When pruning goes wrong

Every grower has a shelf of pruning scars. The common ones:
  • Dieback creeping down from a cut. You left an internode stub and it's dying back toward the branch. Recut 2–3 mm above the next healthy node below the brown; seal if large. If it keeps advancing past clean cuts, treat it as fungal: cut into healthy wood and sterilize blades between cuts.
  • No back-budding where you wanted it. On deciduous trees the usual cause is weakness: feed, full sun, and most pop dormant buds after a hard cutback the next late winter. Junipers and most pines won't bud on bare wood at all — keep foliage near where you want future branches. Don't cut more to force buds from a tired tree.
  • A knuckle swelling where you keep cutting. Repeated cuts at one point build scar tissue into a lump wider than the trunk above it — inverse taper, and it doesn't fix itself. Spread cuts along the branch, never take several branches from one spot in a season, and carve back an existing knuckle or plan a new leader.
  • Browning that isn't at the cuts. Browning weeks later that isn't centered on the wounds probably isn't the pruning — check why your bonsai is turning brown before blaming the shears.

Quick pruning sheet

  • Every cut: 2–3 mm above a node, angled away, to a bud facing where you want growth.
  • Maintenance: shoots to 4–6 nodes, cut back to 2–3, all season.
  • Structural: late winter/early spring, one-third of foliage maximum.
  • Apex twice as hard as the bottom branches — always.
  • Real branches: undercut, drop, concave flush cut, paste on deciduous wounds bigger than a pencil.
  • Healing: pencil cut, 1–2 seasons; quarter-sized, 3–5 years.
  • Junipers: cut to a side shoot, pinch only stray tips, never shear, never into bare wood.
  • Timing: maple big cuts late summer · elm and ficus any month · juniper spring–fall · pine decandle early summer · azalea within 6 weeks of bloom.
  • Weak, sick, or freshly repotted trees: light trims only.

Bonsai Pruning Guide: FAQ